Building a CoAP application on Ariel OS
Ariel OS is an embedded operating system written in Rust, whose first version 0.1. was released recently. It is designed for "constrained devices" (a.k.a. "embedded devices" or "IoT devices"), that is, electronic devices with little power and storage – think "what is in your remote control" and not "what is on your computer". The Constrained Application Protocol (CoAP) is a networking protocol for the same group of devices. It is similar to HTTP in its semantics, but tuned to simple implementation and small messages that work over the most low-power networks.
This tutorial guides you through first steps with both. It is recommended to be familiar with at least any one of software development on embedded systems, software development in Rust, or CoAP. The goal of the tutorial is to convey an understanding for what Ariel OS and CoAP can be used for, and to set up a playground for further exploration of either or both. It assumes that you are using a shell on a recent version of Debian GNU/Linux or Ubuntu, but should work just as well on many other platforms.
The tutorial is grouped into 4 parts:
- Getting started, where we set up hardware, software, and run Ariel OS for the first time;
- Building the application, where we look at how to start and how to use a CoAP server;
- Access control, where we put the S for Security into IoT; and
- Custom CoAP resources, where we explore how CoAP resources can be defined.
Shortcut
If you prefer to just get going without the explanations, the CoAP server example shipped with Ariel is similar to the late stages of this tutorial.
You will find more notes like this throughout the document. They offer additional exercises, further references and context or just debugging tips. Feel free to skip them unless you want to (or, because there is trouble, have to) spend more time on that particular section. They are not necessary to follow the flow of the tutorial. Treat them as side notes.
Getting started
Selecting the hardware
Ariel OS applications run on embedded systems; to get started, this works best with a development kit. Those usually come with an integrated programmer or bootloader.
To run the code of this tutorial, you will need an embedded development board supported by Ariel OS. The Ariel OS manual has an official list of candidates.
For this particular tutorial, the board needs to support
- some networking capability (current choices are Wi-Fi and Ethernet over USB),
- a hardware random number generator, and
- Ariel's storage module.
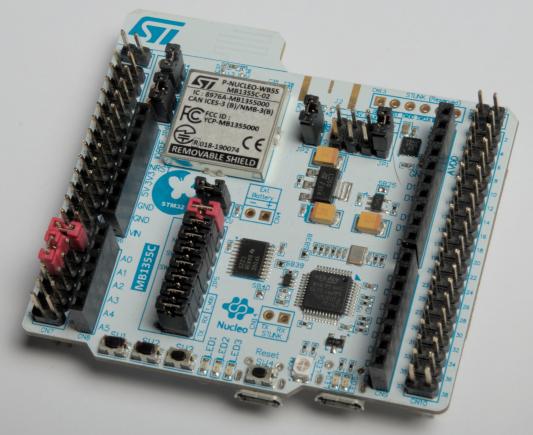
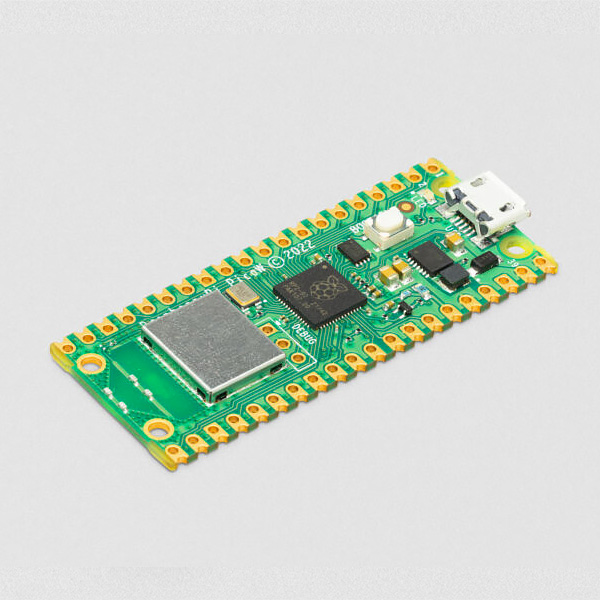
At the time of writing, candidate boards are the nRF52840 DK (nrf52840dk). the Raspberry Pi Pico (rpi-pico), Pico W (rpi-pico-w) or Pico 2, and the ST NUCLEO-H755ZI-Q/-WB55RG (st-nucleo-h755zi-q/st-nucleo-wb55).
The rest of the text will assume that you picked st-nucleo-wb55; if you pick any other, just replace that text with the name of your board (eg. nrf52840dk) wherever it occurs in the rest of the tutorial.
Our own application
Let's build our own application, and call it my-coap-server. The quickest way to do this is through cargo generate:
$ cargo generate --git https://github.com/ariel-os/ariel-os-template --name my-coap-server
"But I don't want no script-generated auto-scaffolding that invites cargo culting!"
No problem. All files needed will be mentioned and quoted in full as part of the tutorial (at latest in the appendix), you can create them all yourself.
You can also start from cloning the ariel-os-hello git template, which at the time of writing is virtually identical to the output of cargo generate.
Let's try that out by running it:
$ cd my-coap-server
$ laze build -b st-nucleo-wb55 run
⟦...⟧
   Compiling ariel-os-utils v0.1.0 ([...])
⟦...⟧
  Programming ✔ 100% [####################]  16.00 KiB @  47.98 KiB/s (took 0s)      Finished in 0.89s
  [INFO ] Hello from main()! Running on a st-nucleo-wb55 board.
Doesn't work? Let's help us fix that.
Drop by on our chat, or open an issue in our issue tracker, and we'll have a look at it together.
Once you see the "Hello from main()" line, we have shown that
- building Rust programs works,
- the tools are in place to flash the program onto your embedded device, and
- the program runs successfully to print "Hello".
Great: You have just run a program on Ariel OS!
For the nitpickers
At least in the st-nulceo-wb55 default configuration, our program does not really print (or even store) any "Hello" message, because our debug console mostly logs through defmt. With that, our program just decides when to print a particular text and sends a short number representing it; the host system then looks up that number in the compiled program.
Building the application
Let's customize our application. We start from the template src/main.rs that initially looks like this:
#![no_main]
#![no_std]
#![feature(impl_trait_in_assoc_type)]
#![feature(type_alias_impl_trait)]
#![feature(used_with_arg)]

use ariel_os::debug::{exit, log::info, ExitCode};

#[ariel_os::task(autostart)]
async fn main() {
    info!(
        "Hello from main()! Running on a {} board.",
        ariel_os::buildinfo::BOARD
    );
    exit(ExitCode::SUCCESS);
}
The first block of lines (#![…) tells Rust that we're not exactly building an everyday PC program. The Rust documentation has links for them all. Don't get too lost there: The Ariel OS maintainers aim to reduce that kind of boilerplate to a minimum over time. The use line is Rust's mechanism to import short names from namespaces, and #[ariel_os::task(autostart)] tells the OS to run this function when the board is booted up.
We want to run a service on the network, so "print some text and terminate execution" is what we'll have to replace.
Side quest
If you are new to embedded or Rust development, you may want to pause here and play around. Many introductory exercises (such as the first steps of the Rust book and many popular exercises). Note that we have explicitly imported an info! macro. You can use that in a way very similar way to the println! that is often seen in tutorials, or simply use Ariel's own println! through an extra import of use ariel_os::debug::println;.
First custom code
Instead of the info and the exit, let's launch a CoAP server, and thus start exploring the network.
A CoAP server, like any web server, needs to be told what to respond to clients, and at which path. We can build a very boring server out of a few lines that replace the content of the main function:
use coap_handler_implementations::{new_dispatcher, HandlerBuilder, SimpleRendered};

let handler = new_dispatcher()
    .at(&[], SimpleRendered("Hello from my CoAP server"))
    .at(&["private", "code"], SimpleRendered("The password is 'mellon'."));

ariel_os::coap::coap_run(handler).await;
The coap_run() function takes any implementation of the CoAP interfaces we use, and runs that as a network server indefinitely. The implementations we pick are assembled from a CoAP handler implementations crate that aims to make frequent simple handlers easy to implement.
Dependency handling
Building this would fail: We start using features and crates we did not enable before.
Making the coap_handler_implementations parts work is classical Rust dependency handling – just add this line to Cargo.toml (and with three more so we don't have to come back here later):
 [package]
 name = "my_coap_server"
 version = "0.1.0"
 edition = "2021"

 [dependencies]
 ariel-os = { path = "build/imports/ariel-os/src/ariel-os", features = [] }
 ariel-os-boards = { path = "build/imports/ariel-os/src/ariel-os-boards" }
+coap-handler-implementations = "0.5.2"
+
+minicbor = { version = "0.24", features = ["derive"] }
+coap-handler = "0.2.0"
+coap-numbers = "0.2.6"
Enabling the ariel_os::coap module follows a different workflow than just enabling features. It uses features of the laze build system to not just enable statically additive features, but to make decisions based on the available modules on where to go. In this concrete case, adding CoAP support pulls in UDP and IP support, and thus network interfaces – and which network interface implementation is used depends on the board. For the rpi-pico-w, this would be Wi-Fi support, but for the st-nucleo-wb55, this is USB Ethernet in the current Ariel release. Cargo currently has no means of handling such situations on its own. We tell laze to pull the right strings in Ariel's setup by adding these lines to laze-project.yml:
 imports:
   - git:
       url: https://github.com/ariel-os/ariel-os
       commit: 3e97d77ecf775824d98c0361bbba2e08aac24298
     dldir: ariel-os

 apps:
   - name: my_coap_server
+    selects:
+      - coap-server
+      - ?coap-server-config-unprotected # We'll come back to this!
You can see how, for your specific board, the output of
$ laze build -b st-nucleo-wb55 info-modules
grows from before to after you added those lines.
Unprotected access? Really? Is it the '90s again?
Please bear with me on two aspects:
- We'll get to it, right one section down.
- There is a plan for secure setups without any intervention at all that needs some enhanced tool support.
A first CoAP request
Time to run a first CoAP server:
$ laze build -b st-nucleo-wb55 run
⟦...⟧
   Compiling ariel-os-utils v0.1.0 ([...])
⟦...⟧
  Programming ✔ 100% [####################] 117.00 KiB @  25.43 KiB/s (took 5s)
  Finished in 6.16s
  [INFO ] Hello from main()! Running on a st-nucleo-wb55 board.
⟦...⟧
⟦... possibly a few seconds pass ...⟧
⟦...⟧
[INFO ] IPv4: UP
[INFO ]    IP address:      10.42.0.175/24
[INFO ]    Default gateway: Some(10.42.0.1)
[INFO ] IPv6: DOWN
[INFO ] Starting up CoAP server
[INFO ] Server is ready.
All looks ready – the precise network configuration you see will depend on your board and network.
Not getting there?
On boards that default to IP over USB, check whether both USB connectors are attached to your computer.
Then, check your network manager: If a new USB Ethernet device has just popped up, edit its IPv4 and IPv6 settings to "Shared to other computers".
On Wi-Fi devices, you'll need to set the Wi-Fi credentials in an environment variable.
IPv4? Really? Is it the '90s again?
We are working on it. (Basic support is there, but enabling IPv6 without at least support for SLAAC, which is what we are working on, is a bit pointless).
Once you see an address, open another terminal. We'll use the tool aiocoap-client, which is invoked similarly to the tool curl you may know from HTTP. Run this command, replacing the IP address with the one from your console output from just before:
$ aiocoap-client coap://10.42.0.175/
Hello from my CoAP server
You just accessed your constrained device over the network.
Just like in HTTP, we address any resources on the device by URLs; they just use the scheme coap rather than https. Also like in HTTP, the method we usually invoke is called GET, which is the default in the client tools, and requests a "representation" of that resource. That representation, the "Hello" text, is what is being printed. As the server indicates a plain text response through the respone's media type "text/plain", the client shows the text as-is.
Exceeding what is provided by default in HTTP, CoAP also has built-in site map, which we can access like this:
$ aiocoap-client coap://10.42.0.175/.well-known/core
# application/link-format content was re-formatted
<>,
</private/code>
Individual resources are distinguished by their path on the server; the server is free to choose paths (outside of the /.well-known/ prefix reserverd by the CoAP specification to features such as the site map). Here we see one more resource we did not use before:
$ aiocoap-client coap://10.42.0.175/private/code
The password is 'mellon'.
The array ["private", "code"] of the source code is shown as the path /private/code here. The representation in the source code is closer to how paths are actually expressed in CoAP: CoAP avoids text proceesing, and instead puts the path in separate options ("options" here are CoAP's parameter fields, similar to HTTP's headers). This is most easily seen in the client's verbose output, which shows a human-readable representation of the messages that is closer to the actual binary data than just the URI:
$ aiocoap-client coap://10.42.0.175/.well-known/core
INFO:coap.aiocoap-client:Sending request:
INFO:coap.aiocoap-client:GET to coap://10.42.0.175
INFO:coap.aiocoap-client:- Uri-Path (11): '.well-known'
INFO:coap.aiocoap-client:- Uri-Path (11): 'core'
INFO:coap.aiocoap-client:No payload
INFO:coap.aiocoap-client:Received response:
INFO:coap.aiocoap-client:2.05 Content from coap://10.42.0.175
INFO:coap.aiocoap-client:- Etag (4): b'\xf1\xd2\x97\x13<\xc93)'
INFO:coap.aiocoap-client:- Content-Format (12): <ContentFormat 40, media_type='application/link-format'>
INFO:coap.aiocoap-client:Payload: 3c3e3c2f612f623e (8 bytes)
# application/link-format content was re-formatted
<>,
</private/code>
Access control, or putting the S for Security into IoT
We have two severe issues in this setup:
- We can't know whether our client is really talking to our board, and
- there is a "secret" sent around without any protection.
Not surprising, though: We left this open in the configuration when we said "unprotected". Let's fix that in laze-project.yml:
     selects:
       - coap-server
-      - ?coap-server-config-unprotected # We'll come back to this!
+      - ?coap-server-config-storage
Limiting access
Create a new file called peers.yml next to that laze file:
- from: unauthenticated
  scope:
    /.well-known/core: GET
    /: GET
As the coap-server-config-storage policy is now used, this file is consulted to decide how to populate the device's storage initially. This ultimately guides its decision process on what to do on incoming requests. Access is denied unless explicitly allowed for a given peer; in this case, we allow any peer (from: unauthenticated) read-only access to the sitemap and the / (root) resource.
Run laze again as before to flash the new firmware. Once the firmware is ready, try aiocoap again:
$ aiocoap-client coap://10.42.0.175/private/code
4.01 Unauthorized
This fixed issue 2, but opens a new issue 3: Not even we can access our own resource! Let's leave this aside for a moment and look at issue 1.
For curious readers
The Wireshark network sniffer can decode CoAP requests. If you run the previous examples again while monitoring your network traffic, you will see all details of your CoAP requests visualized. Be sure to select the right network interface. If you are using Wi-Fi on the board, you may want to use Wireshark's view filter and put coap in there to see only relevant packages.
Authentication
Ariel OS's CoAP stack supports several security mechanisms that eventually set up OSCORE; the manual enumerates them, and gives links and context. For this tutorial, we focus on using EDHOC, which efficiently establishes security for constrained devices from public key cryptography. EDHOC has all the desirable properties of modern Internet communication: It encrypts messages, protects them from manipulation, and gives client and server the tools to be sure of whom they are communicating with. None of this needs to trust the network: As far as secure communication is concerned, requests could be happening across the Internet. Anyone looking at the messages can just learn that a server and a client communicate from their given addresses (metadata), request sizes and timing, but not what the content of their communication is; anyone attempting to manipulate the exchange can at worst keep the peers from communicating, but can not alter their messages' content.
For following the tutorial, it will suffice to understand that both participants in our communication (i.e., the device and your PC) will eventually each have a secret key (which never leaves the device and is never shown on screen) and a public key, which can freely be shown to anyone.
Back to our device:
Since we enabled the coap-server-config-storage module, a new line is shown at startup:
[INFO ] CoAP server identity: [a1, 08, a1, 01, a4, 01, 02, 02, 40, 20, 01, 21, 58, 20, ca, 0c,
   f3, eb, cc, 42, 3d, 5c, 5b, 53, b9, 2b, 20, 2e, fe, 25, ba, 8e, 58, 3d, 4d, 40, 8e, 64, 7c,
   f1, 39, 59, 06, 59, d0, 88]
This is a public key of our device (precisely, a CCS (CWT Claims Set), which contains a COSE key). It was generated at first startup inside the device, and persisted across reboots, at least until there are major changes to the firmware.
We can use this public key to tell our client application whom we expect to talk to.
We are working in Ariel OS to get that line copy-pasteable more easily; until then, you can convert it to a usable format. Run this command, copy-paste the inner parts of the CoAP server identity in your device's output, and press Ctrl-D (twice if needed) to get the array output:
$ cbor-edn cbor2diag -i hex
a1, 08, a1, 01, a4, 01, 02, 02, 40, 20, 01, 21, 58, 20, ca, 0c, f3, eb, cc, 42, 3d, 5c, 5b, 53,
b9, 2b, 20, 2e, fe, 25, ba, 8e, 58, 3d, 4d, 40, 8e, 64, 7c, f1, 39, 59, 06, 59, d0, 88
⟦ press Ctrl-D here ⟧
{
    8:{
        1:{
            1:2,
            2:h'',
            -1:1,
            -2:h'ca0cf3ebcc423d5c5b53b92b202efe25ba8e583d4d408e647cf139590659d088'
        }
    }
}
Create a new file client.diag file like below, customizing
- the top map key: your device's URL, plus the wildcard indicating it applies to all resources on there, and
- peer_cred: the COSE data from above, wrapped in {14: …} as shown:
{
  "coap://10.42.0.175/*": {
    "edhoc-oscore": {
      "suite": 2,
      "method": 3,
      "own_cred": {"unauthenticated": true}, / Once more, we will come back to this /
      "peer_cred": {14: {8: {1: {1: 2, 2: h'', -1: 1,
          -2: h'ca0cf3ebcc423d5c5b53b92b202efe25ba8e583d4d408e647cf139590659d088'}}}},
    }
  },
}
That doesn't look like valid JSON.
Right: It isn't. Constrained devices don't do string processing well, and text labels can become a huge overhead on networks where every byte counts. The data is encoded in a human readable form of CBOR, which is to JSON like CoAP is to HTTP. If you are familiar with JOSE, most prominently known from JWTs, you will find the same concepts but compact and binary in COSE (that is what you copy-pasted above), and there are even CWTs, which are supported by Ariel OS but not used in this tutorial.
Now that we can describe whom we expect to talk to, let's tell that to our client in the next request:
$ aiocoap-client coap://10.42.0.175/ --credentials client.diag
Hello from my CoAP server
Potential footgun
Take care with the {14:…} around the {8:…}: That needs to stay there; if your request is not successful, check again whether your peer_cred still is of the same shape as in the listing above.
We have thus addressed issue 1, and can be sure we talk to the right device. This is already similar to what you get on your typical browser's HTTPS connection: the client knows who the server is, and the server talks to any client. The difference is that unlike for domain names, where a certificate hierarchy is installed in the browser and any of many organizations has performed some checks to ensure the server operator "owns" the domain, there is no such hierarchy in IP addresses. Instead, we have manually accepted the server's public key, like we might accept a self-signed certificate in a web browser.
You don't own it until you break it.
Try changing any bit in the peer_cred structure, or switch to a different embedded device (just be sure to update the address or the configuration will not be applied), and the request will fail. You may observe different modes of failure: For example, arbitrary modifications to the long hex string (the public key) even fail before a request is sent (because it is not even a valid public key). To get to a failure mode where things work up to the point where the cryptographic checks reject them, you can use the tutorial's hex public key – there is no chance that that is your own device's key.
Things may also fail with the same device if you change the firmware too much; with the current version of Ariel, storage may or may not persist through a firmware update.
Mutual authentication, and authorization
The last item to tackle is accessing restricted resources, allowing only you read the /private/code resource.
To define what "you" means, you will need to create a secret key on the PC – previously, the client created a random one for every request.
Run this to create a new key, which gets stored in myself.cosekey:
$ aiocoap-keygen generate myself.cosekey --kid 01
{14:{8:{1:{1:2,2:h'01',-1:1,-2:h'bcd82eeaa8956d4eb4179eae5c0c425055f848d3b9116c50fa9bacc0f882bd31',
-3:h'7e862424798d289cf130ff69a47918c5120bd1d8721bd1030c050ee4521d874e'}}}}
This writes a secret key to a file readable only by you, and outputs a public key in the COSE format you are now already familiar with. A change to client.diag tells aiocoap to use this key to talk to this device; as always, put in the values you had in your previous output instead of the example data:
       "method": 3,
-      "own_cred": {"unauthenticated": true},
+      "own_cred_style": "by-key-id",    / This is why we put --kid in; had we not, we'd put "by-value" and send more data. /
+      "own_cred": {14:{8:{1:{1:2,2:h'01',-1:1,-2:h'bcd82eeaa8956d4eb4179eae5c0c425055f848d3b9116c50fa9bacc0f882bd31',
+          -3:h'7e862424798d289cf130ff69a47918c5120bd1d8721bd1030c050ee4521d874e'}}}},
+      "private_key_file": "myself.cosekey",
       "peer_cred": {14: {8: {1: {1: 2, 2: h'', -1: 1, -2: h'ca0cf3ebcc423d5c5b53b92b202efe25ba8e583d4d408e647cf139590659d088'}}}},
We also need to tell our firmware by adding these lines to peers.yml:
- kccs: |
    {8:{1:{1:2,2:h'01',-1:1,-2:h'ec1d9db0b8eb9672802808b7729712b97f9d0acf15cf30eeab60c63ddc38f660',
    -3:h'bc61c6a75a242eb7724edc0664c20d530e6f5ba43e8a8e02c0836dacb9199a74'}}}
  scope: allow-all
Remember the footgun above?
It's right there again, in the other direction: the peers.yml does not take the outer {14:…} layer. Work is ongoing to harmonize this between the tools involved. For background, aiocoap treats credentials to be a COSE header map (where key 14 indicates a kCCS), whereas Ariel OS's coapcore and the underlying Lakers libraries work more in terms of CCSs as stand-alone entities.
Instead of allow-all, you could just as well enumerate paths explicitly – either way, you (and only you) now have access to all resources.
Flash the firmware, and try it out:
$ aiocoap-client coap://10.42.0.175/private/code --credentials client.diag
The password is 'mellon'.
Custom CoAP resources
So far, we have registered two resources in our CoAP handler, both using the SimpleRendered implementation. You could write arbitrary CoAP handlers by implementing the coap_handler::Handler trait manually – but while that offers full control, it is also a tedious exercise.
Instead, let's look at a few other easy handlers to add.
Text on the fly
While plain text is definitely not embedded devices' forte, it is a simple first example.
Let's think of our system as some kind of toy motor control. Actually controlling a motor would excede the scope of this tutorial; this is going to be a pretend motor.
Put this code anywhere in the src/main.rs file outside the main function, eg. above it:
use core::cell::Cell;

#[derive(Debug, Copy, Clone)]
enum MotorState {
    Stop,
    Forward,
    Reverse,
}

struct ShowStatus<'a> {
    motor: &'a Cell<MotorState>,
    endstop: &'a Cell<u32>,
}

impl coap_handler_implementations::SimpleRenderable for ShowStatus<'_> {
    fn render<W: core::fmt::Write>(&mut self, w: &mut W) {
        writeln!(w, "Current motor status: {:?}", self.motor.get()).unwrap();
        for _ in 0..self.endstop.get() {
            writeln!(w, "The endstop has been triggered.").unwrap();
        }
    }
}
First, we define which states a motor can be in: forward, reverse or stopped.
Then, we describe a new type of handler, ShowStatus, that will eventually show the state of a system composed of a motor state and a the number of times an endstop has been triggered. Rust has a strict model of ownership: By default, one component can be in control of any item at any time. The Cell that both the MotorState and the 32-bit integer are wrapped in describes that this is an item that is shared by multiple parties (but small enough that they can just always copy it around, which is why we derive Copy and Clone on the motor state). The 'a are lifetimes to the shared reference the status holds; the Rust book has a chapter on them, but for here it suffices to say that they ensure that the handler is not around for longer than the motor state.
Finally, we describe how such a resource acts as a CoAP resource. Rather than implementing the relatively low-level Handler, we implement an interface (a Trait) that is more high-level, and easy to use for text based applications: SimpleRenderable. This requires us to describe how the handler is rendered into a writer (the compiler promises us that this will work for any W), which we do by using the write! macro, which is similar to println! or info! from earlier. (This is where the Debug derive is needed for: it gives the motor state a convenient text representation that can be reported).
Note that rather than printing a number for endstop events, we print a new line for every single time it happened. This is not a good design, but convenient for the end of the tutorial. By then, we will also see why writing can never fail, and the dreaded .unwrap() is acceptable here.
We've seen one implementation thereof before: Strings (&str) are also SimpleRenderable, and we used them wrapped in SimpleRendered to turn them into full handlers. We can use the motor controller the same way to hook it into our resource list:
+    let motor = Cell::new(MotorState::Stop);
+    let endstop = Cell::new(0);

     let handler = new_dispatcher()
+        .at(&["status"], SimpleRendered(ShowStatus { motor: &motor, endstop: &endstop }))
         .at(&[], SimpleRendered("Hello from my CoAP server"))
We don't need to update the security policy at this time because your PC's key is already allowed to access all resources. Run laze again and look at the system's state:
$ aiocoap-client coap://10.42.0.175/status --credentials client.diag
Current motor status: Stop
Actions and encodings
So far, this motor stays off. Let's add some resource for machine-to-machine motor control, where a concise binary representation of the motor's state can be read or written:
use coap_handler_implementations::{TypeHandler, TypeRenderable};

struct MotorControl<'a> {
    motor: &'a Cell<MotorState>,
}

impl<'a> TypeRenderable for MotorControl<'a> {
    type Get = MotorState;
    type Post = ();
    type Put = MotorState;

    fn get(&mut self) -> Result<MotorState, u8> {
        Ok(self.motor.get())
    }

    fn put(&mut self, representation: &MotorState) -> u8 {
        match *representation {
            MotorState::Stop => info!("Stopping the motor"),
            MotorState::Forward | MotorState::Reverse => info!("Starting the motor"),
        }
        self.motor.set(*representation);
        coap_numbers::code::CHANGED
    }
}
Unlike with the SimpleRenderable inteface we used before, in TypeRenderable we do not spell out how to render something to a GET request, but we specify what to render. The "how" is then addressed by a yet to be chosen serializer. We do have to state through which types that conversion goes explicitly; the type … = …; lines do this even for the POST method, which we do not use here. (A planned Rust feature will eventually remove the need to do this).
For this example we pick the minicbor serializer, which converts our motor state to and from a CBOR item. CBOR is short for Concise Binary Object Representation, and brings the ad-hoc usability of JSON and its data model to embedded systems.
In order for minicbor to understand how to serialize our motor state, we have to extend its definition:
 #[derive(Debug, Copy, Clone)]
+#[derive(minicbor::Encode, minicbor::Decode)]
+#[cbor(index_only)]
 enum MotorState {
+    #[n(0)]
     Stop,
+    #[n(1)]
     Forward,
+    #[n(2)]
     Reverse,
 }
This means that our state will be expressed as a simple 1-byte integer. The minicbor documentation has the details on what the added lines mean precisely, and how it is applied to any more complex objects you may encounter when extending this.
In parallel to a GET method, we also added a PUT method, which finally gives us control of the motor. The PUT method is commonly used in HTTP and CoAP to update a resource to some new desired state: the client just sends the data it wants there to be in the resource.
The PUT implementation produces some log messages that will be shown on the console; this stands in for any real motor control that might happen instead. After changing the value, we explicitly tell which CoAP response code to send. The need to do this comes from the implementation choices of the TypeRenderable interface: In CoAP itself, every response has its status code – it's just that TypeRenderable knows which one to send for a successful GET, but not for PUT.
Wiring it up, we need to specify two more pieces of information: which serializable interface we implented (minicbor version 0.24, this can not be inferred by the compiler) and that there is any additional metadata we want to advertise (unlike SimpleRendered, this type does not provide any defaults for discovery; the resource type here will be shown in the site map and would thus be useful in automation).
         .at(&["status"], SimpleRendered(ShowStatus { motor: &motor, endstop: &endstop }))
+        .at_with_attributes(
+            &["m"],
+            &[coap_handler::Attribute::ResourceType("tag:example.com,2025,motor")],
+            TypeHandler::new_minicbor_0_24(MotorControl { motor: &motor })
+        )
         .at(&[], SimpleRendered("Hello from my CoAP server"))
Let's try it out – obtain the old value, and set a new one:
$ aiocoap-client coap://10.42.0.175/m --credentials client.diag
# CBOR message shown in Diagnostic Notation
0
$ aiocoap-client coap://10.42.0.175/status --credentials client.diag
Current motor status: Stop
$ aiocoap-client coap://10.42.0.175/m --credentials client.diag -m PUT --payload 2 --content-format application/cbor
$ aiocoap-client coap://10.42.0.175/m --credentials client.diag
# CBOR message shown in Diagnostic Notation
2
$ aiocoap-client coap://10.42.0.175/status --credentials client.diag
Current motor status: Reverse
Got EDHOCError::MacVerificationFailed?
If this error comes up, the firmware size changed too much, and the previous device identity got overwritten. You can update your client.cred with the new identity by repeating the step from the Authentication chapter.
For sending the request to update the parameter, the client needed three new parameters:
- That we want to PUT data. (This is not the only option do send data, we'll see POST later).
- Which payload to send: As per the description of motor state, 2 means "reverse".
- How to send the data: While on incoming data the client can recognize the media type sent along with the data, and could turn the binary data into human readable numbers (this is what the # CBOR message shown in Diagnostic Notation tells), we need to be explicit here to allow the tool to convert from a human-readable version into the right binary representation.
Looking over to the device's debug output, you will now also see lines such as:
[INFO ] Starting the motor
As a last resource, let's add an endstop – a trigger that might prevent a roller blind from going too far:
struct EndstopControl<'a> {
    motor: &'a Cell<MotorState>,
    endstop: &'a Cell<u32>,
}

impl<'a> TypeRenderable for EndstopControl<'a> {
    type Get = ();
    type Post = coap_handler_implementations::Empty;
    type Put = ();

    fn post(&mut self, _representation: &Self::Post) -> u8 {
        self.motor.set(MotorState::Stop);
        self.endstop.set(self.endstop.get() + 1);
        info!("Endstop hit!");
        coap_numbers::code::CHANGED
    }
}
+        .at_with_attributes(
+            &["e"],
+            &[coap_handler::Attribute::ResourceType("tag:example.com,2025,endstop")],
+            TypeHandler::new_minicbor_0_24(EndstopControl { endstop: &endstop, motor: &motor })
+        )
Here, we expose only a POST method, which (both in HTTP and CoAP) may be used with or without a payload (here we use it without any). It has no such clear universal semantics as PUT, but generally means "do something with this now". For the resource type we define here, its meaning shall be "Stop the motor, the endstop contact was hit".
In a networked environment, this is something for which we could use more fine-grained control: If the endstop contact is connected through a network, we can let that component trigger a motor stop, but it must not start the motor on its own.
To simulate working on a new system, create a new credentials file endstop-client.diag along with an own key for that (you can look back to the Mutual authentication, and authorization chapter for details).
A peers.yml file can now look like this:
- from: unauthenticated
  scope:
    /.well-known/core: GET
    /: GET
    /summary: GET

# Your own key
- kccs: |
    {8:{1:{1:2,2:h'01',-1:1,-2:h'ec1d9db0b8eb9672802808b7729712b97f9d0acf15cf30eeab60c63ddc38f660',
    -3:h'bc61c6a75a242eb7724edc0664c20d530e6f5ba43e8a8e02c0836dacb9199a74'}}}
  scope:
    /.well-known/core: GET
    /summary: GET
    /m: [GET, PUT]

# The key for the endstop client
- kccs: |
    {8:{1:{1:2,2:h'01',-1:1,-2:h'b59cd78510257f61529e0f914fdb2390d258c8c212cf3a74e71e8b61b62324bb',
    -3:h'2ac3e574898dc16b89692678af9e3950d5e46bf786b8dd8dd081091befdfe785'}}}
  scope:
    /.well-known/core: GET
    /e: POST
An endstop client is now limited to discovering and performing the one task it is desigend to be:
$ aiocoap-client coap://10.42.0.175/.well-known/core --credentials client.diag
# application/link-format content was re-formatted
</status>,
</m>; rt="tag:example.com,2025,motor",
</e>; rt="tag:example.com,2025,endstop",
<>,
</private/code>
$ aiocoap-client coap://10.42.0.175/e --credentials endstop-client.diag -m POST
$ aiocoap-client coap://10.42.0.175/e --credentials endstop-client.diag -m POST
$ aiocoap-client coap://10.42.0.175/m --credentials endstop-client.diag
4.01 Unauthorized
One more neat CoAP feature
Remember the /status resource that kept printing an entry for every endstop contact? CoAP is built on UDP and hesigned for small messages, so what happens when that exceeds the typical size of a UDP message (about 1 kilobyte)?
There is a CoAP mechanism called "block-wise transfer" that enables simple transfer of large resources by requesting them one chunk at a time, and re-assembling them (with checks in place that detect when the whole resource changed). While not available in all handler types, the SimpleRendered family of implementation just takes care of this. Any prints beyond the end of the current chunk are mostly discarded, so writes in there can never fail – they just need more and more packets to view the whole item.
Try it out: Trigger the endstop several times. The client will automatically assemble the response and make no big fuss about it, but eventually, a single CoAP "Block2" option in aiocoap's verbose output will give you a hint that block-wise transfer has happened:
$ aiocoap-client coap://10.42.0.175/status --credentials client.diag -v
INFO:coap.aiocoap-client:Sending request:
INFO:coap.aiocoap-client:GET to coap://10.42.0.175
INFO:coap.aiocoap-client:- Uri-Path (11): 'status'
INFO:coap.aiocoap-client:No payload
INFO:coap.aiocoap-client:Received response:
INFO:coap.aiocoap-client:2.05 Content from coap://10.42.0.175
INFO:coap.aiocoap-client:- Etag (4): b'\x87\x06\xa3\xa1I\xf8X\xb7'
INFO:coap.aiocoap-client:- Block2 (23): BlockwiseTuple(block_number=1, more=False, size_exponent=6)
INFO:coap.aiocoap-client:Payload: 43757272656e74206d6f746f72207374... (1403 bytes total)
Current motor status: Stop
The endstop has been triggered.
The endstop has been triggered.
⟦...⟧
Summary
This concludes the tutorial. In summary, you can now:
- Build your own applications with Ariel OS, and install them on a device;
- build CoAP server applications, and use them from different computers; and
- understand who can access your devices, and make your own choices about it.
Further resources to explore from here:
- The Ariel OS book provides an overview over other features the operating system provides.
- The coap-handler-implementations crate introduces many more helpers for building CoAP systems on this tutorial. The coap-message-demos crate contains several examples of how to use them.
- coap.space links to many more CoAP tools.
- All CoAP components presented here also work on other CoAP libraries, such as coap-rs. The coapcore crate that is developed as part of Ariel OS does the heavy lifting on the security parts, and can be used with many outside scenarios.
- More and updated tutorials will be announced on the Ariel OS Mastodon account.
Have fun exploring them!
Appendices
Working without user-installed tools
None of the tools "needed" for this tutorial are completely irreplacible:
- cargo-generate: This is just used to generate usable files as a starting point. Instead of using it, you can create all files in their mentioned locations manually as they are listed throughout the tutorial, including in the next section.
- cbor-edn: There is an online service at https://cbor.me/ that can perform the same conversions as this tool. Alternatively, the cbor-diag Ruby gem provides equivalent functionality.
- aiocoap: Instead of installing, you can run the tool from a cache by replacing all calls to aiocoap with pipx run --spec "aiocoap[oscore,prettyprint]" aiocoap-client, or install aiocoap in a Python virtual environment. An alternative CoAP client is libcoap's coap-client, which at the time of writing does not support EDHOC security.
The tools required for Ariel OS itself (described in its book's chapter on installing the build tools) are not so easily replaced, but rustup is by now part of many Linux distributions. For laze and probe-rs-tools, there are currently no known alternatives to installing them from source.
Fine print: The files we skipped
If you go through the tutorial without cargo generate, or are curious about the other files, here is what we did not touch. Alternatively, you can get them from the ariel-os-hello git template.
rust-toolchain.toml: So far, Ariel needs a nightly toolchain; while "latest nightly" usually works, we pin it to a specific nightly to avoid surprises. The file also lists targets (CPU types) that rustup should download, and components that are needed for some optimized builds.
[toolchain]
# this should match the toolchain as pinned by ariel-os
channel = "nightly-2024-12-10"
targets = [
  "thumbv6m-none-eabi",
  "thumbv7m-none-eabi",
  "thumbv7em-none-eabi",
  "thumbv7em-none-eabihf",
  "thumbv8m.main-none-eabi",
  "riscv32imc-unknown-none-elf",
  "riscv32imac-unknown-none-elf",
]
components = ["rust-src"]
.cargo/config.toml: Just like it depends on unstable Cargo features, Ariel also applies modifications to existing crates – we aim to upstream all those, but often use the changes before the PR is merged in the original project (both to keep development swift and to thoroughly test the changes we propose).
The Cargo configuration pulls in a bunch of these overrides from Ariel's ariel-os-cargo.toml file. That file also contains convenient updates to default optimization levels.
include = "../build/imports/ariel-os/ariel-os-cargo.toml"

[unstable]
# This is needed so the "include" statement above works.
config-include = true
About this tutorial
Written 2025-03 by Christian Amsüss chrysn@fsfe.org, published under the same license terms as Ariel OS (MIT or Apache-2.0).
Different terms apply to the images used:
- Ariel logo: Apache-2.0 or MIT, 2020-2025 Freie Universität Berlin, Inria, Kaspar Schleiser, <https://github.com/ariel-os/ariel-os/>
- STM32 photo: same as the text
- Raspberry Pico W: CC-BY-2.0, 2022 SparkFun Electronics, <https://commons.wikimedia.org/wiki/File:RPI_PICO_W_1.jpg>
The author is a contributor to the Ariel OS project; the views expressed in this blog post are his, and do not reflect any consensus or opinions of the Ariel community.
| Tags: | blog-chrysn |
|---|